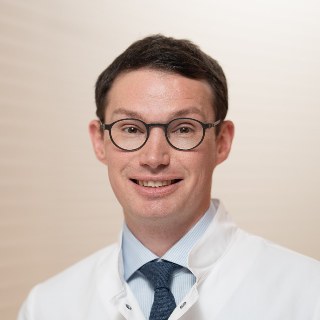
Developed by
Priv.‑Doz. Dr. med. Philipp A. Michel
Consultant in orthopaedics and trauma surgery, focusing on arthroplasty. CendovaPlan grew out of his own surgical planning — as a free tool for colleagues.
The software is free — templates come from the implant manufacturer.
No subscription, no licence fee, no account — free to use, permanently.
The full source code is open: download it, review it — and adapt it to your own needs, from the measurement workflow to your own template library.
Official radiographic templates are supplied by the implant manufacturer — imported once, then permanently available locally.
Install, open a DICOM, plan — no server, no activation. Or start the demo right away.
One workflow, four building blocks.
Hip: leg-length balance, femoral profile with Dorr and CPAH classification. Knee: 17-point workflow with live CPAK and Paley deformity analysis. Shoulder: CSA, acromion index, DTI and more.
Template hip, knee and shoulder, align, read off resections — shoulder anatomic and reverse. Knee: realignment osteotomy (HTO, DFO, double level) after Miniaci with image simulation.
Page 1 is the poster for theatre — print it, put it up, done.
DICOM in, PDF out — no upload, no telemetry, GDPR-friendly.
Genuine views from the application — click to enlarge.
Radiograph credits: Hellerhoff, licensed CC BY‑SA (full leg · AP pelvis) — anonymised teaching images from Wikimedia Commons, loaded as demo DICOMs. Shoulder radiograph (Grashey): public domain (CC0). Femoral profile and osteotomy: our own anonymised radiographs without personal data.
From zero to a finished plan in four steps.
Current version: v0.1.4 (October 2026) — femoral profile with Dorr/CPAH, knee realignment osteotomy, new results column. Release notes ↗
macOS — installation via Terminal (recommended):
curl -fsSL https://cendova.de/install-mac.sh | bash
Open Terminal (⌘ + Space → “Terminal”), paste the line, press Enter — installs or updates CendovaPlan without a Gatekeeper block.
Windows: unzip the archive, double-click “Installieren.cmd”, then confirm the SmartScreen prompt with “Run anyway”.
macOS: the Terminal one-liner above is recommended — files fetched via curl carry no quarantine attribute, so the Gatekeeper block on unsigned downloads does not apply. The macOS ZIP (e.g. for a USB stick) is also started from Terminal: bash install-mac.command inside the unzipped folder. A double-click, by contrast, shows “… cannot be opened” because the installer is not signed with an Apple certificate.
The installer sets up Git and Node.js, downloads CendovaPlan and creates a clickable start icon (Windows: desktop shortcut; macOS: “CendovaPlan” app in Launchpad) that updates automatically on launch.
Detailed guide for hospital IT →Download and run the installer — it sets up Node.js and Git itself.
Import the package from your implant manufacturer once — it stays local.
Open a DICOM, calibrate with a marker ball or ruler — the full measurement guides you point by point.
Align the template, compare sizes — theatre poster as PDF.
A pure frontend with no backend: DICOM files are opened in the browser, measured — and discarded again. All you need is a WebGL-capable browser.
Information for hospital IT →No upload
No cloud
No telemetry
No account
Developed by
Consultant in orthopaedics and trauma surgery, focusing on arthroplasty. CendovaPlan grew out of his own surgical planning — as a free tool for colleagues.
CendovaPlan is a learning, research and demonstration tool — not a medical device within the meaning of Regulation (EU) 2017/745 (MDR) and not intended for clinical use. Manufacturer templates are not included (“bring your own templates”). Source code open under Apache‑2.0.
Where would you like to start?
Sample image hip — AP pelvis Start planning right away: leg lengths, CCD with head diameter, femoral profile (Dorr/CPAH) and osteotomy on the loaded sample image. Sample image knee — full leg AP Start planning right away: full measurement, CPAK and realignment osteotomy on the loaded sample image. Sample image shoulder — AP (Grashey) Start planning right away: CSA, acromion index, DTI and templating on the loaded sample image. Load your own DICOM Empty viewport — just drag in your own file, folder or ZIP.Sample images: anonymised, freely licensed teaching radiographs — no patient data. Your own DICOMs never leave your computer either.
Scroll = zoom · Drag = pan · Double-click = 100 % ↔ 240 % · Esc closes